
Toolbar
Commonly used Asset Window functions are accessible through the Asset Window Toolbar.
Single-click on the toolbar button to carry out the action represented by that button. The default location for the toolbar is across the top of the Asset Window but it may be docked across the bottom, left, or right side. You may further customize the toolbar by adding or removing commands and assigning your own keyboard shortcuts to each command.
You may also display, hide, and customize the floating toolbars.

To dock the toolbar in a different location
- Click on the Customize button
 on the toolbar
 - Select the preferred location (Dock Top, Dock Bottom, Dock Left, Dock Right)
To add and/or remove buttons to/from the Asset Window Toolbar
- Click on the Customize button on the toolbar
- Select the "Customize Toolbar & Keyboard..." command:
- Place a check on the commands you want to add and clear existing checks from commands you want to remove. Commands that have a red check box can not be added to the toolbar, but a keyboard shortcut may be assigned to them (see below).
- You may also choose from one of the pre-defined Toolbar configurations using the pull-down menu. These have been defined based on the five major flavors of RealityLINx.
- Use the Keyboard shortcut option to define or change keyboard shortcuts. Simply press a combination of keys you wish to assign to a command while having the cursor in the box and click the "Assign" button. If an existing combination of keys is already being used you will be prompted to enter a different combination.
- Assigning single key shortcuts may not always work. When the cursor is in the Asset Explorer and a single alpha key is pressed, a search will be done for the first asset whose name starts with that key and the shortcut will not be executed.
- You can see a list of the default shortcuts here.
- You can also configure whether or not the toolbar attached to the asset window is displayed by checking the "Show Toolbar in Asset Window" box.
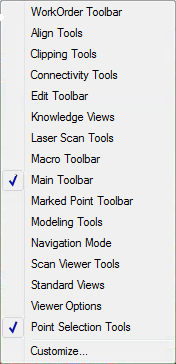
To show/hide predefined toolbars
In addition to the tool bar attached to the Asset Window, you can display any of the predefined tool bars which functionally group the different commands in RealityLINx. To show/hide the toolbars, simply right click on the menu bar and choose the tool bars.


Connectivity Tools for showing connected assets, breaking existing connections and creating new ones, and showing flow direction:

Laser Scan and Laser Scan Region Tools:

Execute Macros:

Modeling Tools for manipulating, aligning, connecting, joining, breaking, inserting, assigning flow direction, flipping, snapping, extending, and assisted modeling of assets:


You may further customize these toolbars by using the customize button to "Add or Remove Buttons". Any changes will be saved for the current windows user and future sessions of RealityLINx will have these customizations.
To create new toolbars
You may also define your own toolbar by using the Customize command after right-clicking on the menu bar.
- Click on the "New" button and specify a name for the new toolbar.
- Go to the "Commands" tab and choose any command an click and drag it onto the new toolbar.
See the Asset Window Menu page for a list of these commands.