
Taking Measurements
V-Suite CORE allows the user to take highly-accurate measurements from laser scans and 3-D models. These measurements can be used to calculate distances and diameters and create marked points. Users can override the default visual appearance of measurements in the Options dialog under Tools.
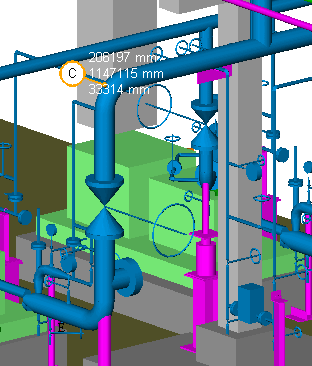
Point Measurement
Notice the Coordinate with respect to Plant Coordinates will be displayed in the current Dimensional Project Units. |
|
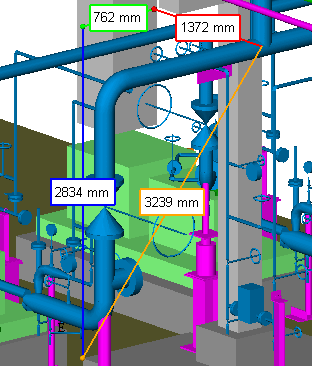
Distance Measurement
Notice the total distance as well as the separate major axis dimensions are displayed in the current dimensional project units. The east component is in red, the north in green and up in blue. |
|
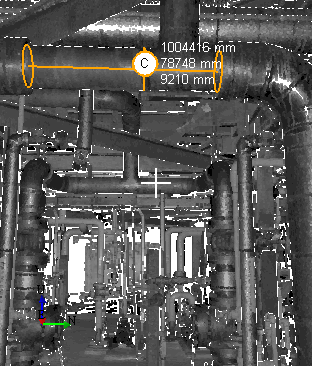
Centerline Measurement
Notice the coordinate at the centerline from the surface point clicked with respect to plant coordinates will be displayed in the current dimensional project units. |
To enable snap points
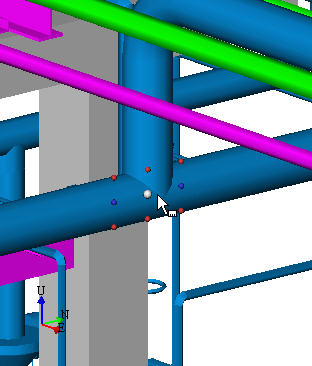
Snap points are used to help align measurement points to the exact middle, edge, or center of a line or object. Snap points are used to help quickly measure or mark a particular point on the 3D model. The possible snap points for a particular element depend on the type of element. While in Measure mode, when you hover over an element and press the SHIFT key, the selected snap point will be one which is closest to the 2D cursor position. As you move the cursor around on the element, the selected snap point will change. Snap points that are on the surface of objects are drawn in red, while snap points that are inside of objects, such as center lines and midpoints are drawn in blue. |
|
More advanced measurement functionality including storing multiple measurements and performing calculations is described in the Measurement Tool Window section.
To hide the measurements from the Asset View, click on the Hide Measurements button  from the Asset View Toolbar. This will stop displaying the measurements from the view but it will not delete them.