
Laser Scan Import and Synchronization
V-Suite CORE can import laser scan data from Leica, Z&F, and FARO hardware. The import reads the files from the scanner and creates new compressed files called PCS files. To import the files, you must create a Laser Scan Import Job, which stores which files/directories will be imported and which import settings to use during the import for each scan. Importing scan files can only be done while working in a work order or standing task.
Laser Scan Import
Creating a Scan Job can be done in one of two ways (from the Laser Scans tab):
In the menu bar, select File->Update Project->Physical Data
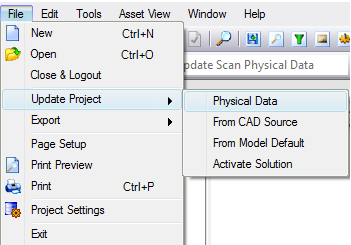
Click on the New Laser Scan Import Job button  in the Physical Data Manager.
This will present the Laser Scan Import Wizard.
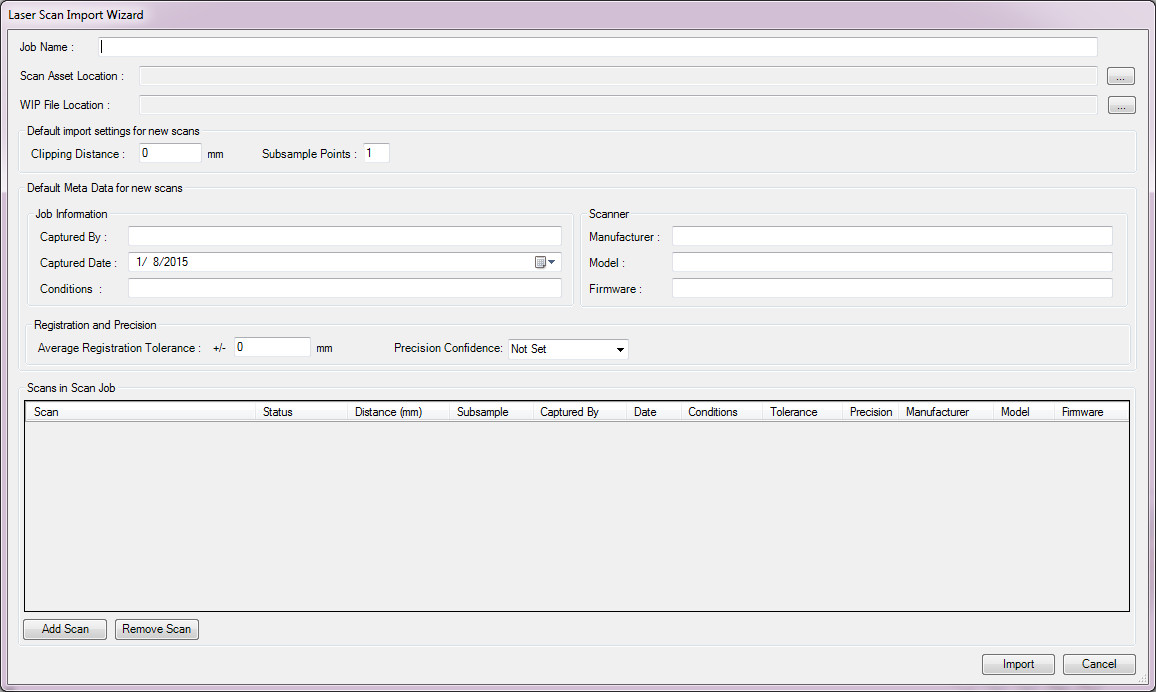
- The Laser Scan Import Wizard allows specification of several fields that must be specified:
- Job Name - This is the name of the Job to be presented in the Physical Data Manager. Once a Job has imported Laser Scans, this name cannot be changed.
- Scan Asset Location - The location in the Asset Hierarchy where Laser Scans will be created. This location will not affect the location of Laser Scans which have already been imported.
- WIP File Location - The location on disk where converted files will be written.
- The Laser Scan Import Wizard allows specification of optional meta data and import settings for new scans. These settings will be applied to all scans selected for import, but will not affect Laser Scans which have already been imported.
- The Subsample Points setting will subsample the points from the source file. Specify the subsample rate in the box. For example, if you specify 2, only every 2nd point will be imported, making the resulting file smaller.
- The Clipping Distance setting lets you to specify the maximum distance points may be from the scanner position.
- The Default Meta Data allows specification of import information. The meta data has no affect on the converted scan, but instead is provided to maintain additional information about Laser Scans.
- This information may also be specified on individual scans via modifying cells in the grid underneath Scans In Scan Job. You may only modify information for Pending scans.
- Pending scans may be added and removed from the Scan Job, however Scans that have already been imported may not be removed from the Scan Job via the Laser Scan Import Wizard. To remove scans from a Scan Job that have already been imported, delete the Scans from the Asset Hierarchy.
- Once a set of Scans to be imported has been specified, and you are ready to import these files, press the Import Button. Note that the import button will not be enabled until you have specified the three fields described in section 1.
- Once Import is pressed, the intensity distribution for the first Pending scan is calculated and shown. This may take several minutes. Once the intensity distribution has been calculated, a new dialog appears which allows modification of the intensity ranges of the scans imported for this Scan Job. Changing the Brightness and Contrast will interactively show what will occur for the intensity distribution of the first Pending scan. The same intensity remapping is applied to all scans in the job, however the first scans distribution is used as a guide with respect to the shown histogram. Note that the remapping only occurs once for the Scan Job - only when the first scan is imported. If scans are added to the Scan Job at a later time, the same intensity mapping will be applied to later import.
- Once remapping is completed, import of the scan files with a Pending status will commence. If importing encounters errors with scans, the status will be changed to Failed. Additional information on scan import failure can be investigated in the error log. Scans that have been imported successfully will be changed to Finished status.
Importing additional scans into a Scan Job can be done in one of two ways (from the Laser Scans tab):
- Click on the Add Scans to Import Job button
 in the Physical Data Manager.
 - Double click a Scan Job in the Physical Data Manager.
This will present the Laser Scan Import Wizard
- If you are working in production, you will only be able to see which scans have been imported in this Scan Job and their respective import settings and metadata. The Laser Scan Import Wizard will be read only with respect to importing scans.
- If you are working in a Work In Progress, the Laser Scan Import Wizard will allow importing of new scans and view of previously imported scans.